
자바 REST API 호출과 JSON Parser 정리(카카오 블라인드 2차 코테 준비)
by 줌코딩
동기
- 카카오 블라인드 코테 2차는 프로그래머스와 같은 플랫폼을 이용하는 것이 아니라 REST API를 이용해서 대회 서버와 통신을 주고 받는다.

- 이를 위해 C++ REST API 코드를 찾아봤는데 내가 이해할 만큼 단순한 소스 코드를 찾기를 실패해서 JAVA를 이용하기로 했다.
- 그럼 자바의 REST API 소스 코드를 이용하는 방법과 응답값으로 받은 JSON 데이터를 처리하는 방법을 소개하려고 한다.
REST API 예제 소스코드
코드는 ckddn9496의 github을 참고했다.
아래 예제 코드는 2019 카카오 블라인드 2차 코테 API를 기반으로 되어있다.
POST 형식 Request
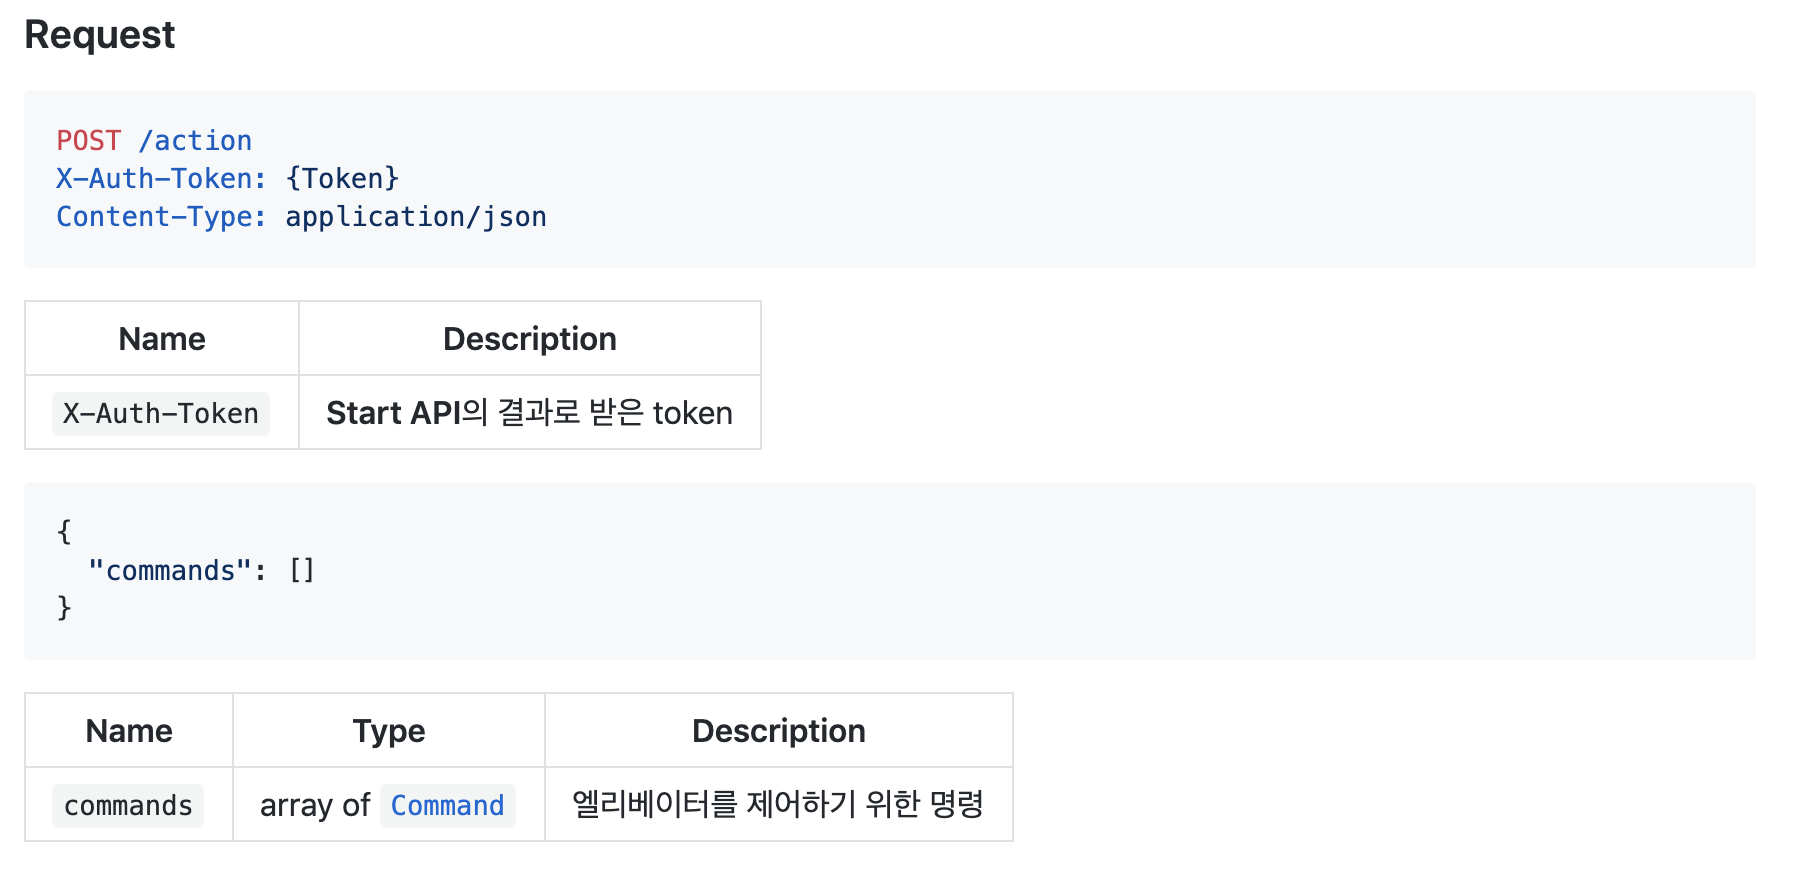
Data actionAPI(JSONArray commandlist) {
    HttpURLConnection conn = null;
    JSONObject responseJson = null;

    try {
        //URL 설정
        URL url = new URL(this.HOST_URL + "/action");

        conn = (HttpURLConnection) url.openConnection();
        //Request 형식 설정
        conn.setRequestMethod("POST");
        conn.setRequestProperty("X-Auth-Token", this.token);
        conn.setRequestProperty("Content-Type", "application/json");

        //request에 JSON data 준비
        conn.setDoOutput(true);
        BufferedWriter bw = new BufferedWriter(new OutputStreamWriter(conn.getOutputStream()));
        //commands라는 JSONArray를 담을 JSONObject 생성
        JSONObject commands = new JSONObject();
        commands.put("commands", commandlist);
        //request에 쓰기
        bw.write(commands.toString());
        bw.flush();
        bw.close();

        //보내고 결과값 받기
        int responseCode = conn.getResponseCode();
        if (responseCode == 400) {
            System.out.println("400:: 해당 명령을 실행할 수 없음 (실행할 수 없는 상태일 때, 엘리베이터 수와 Command 수가 일치하지 않을 때, 엘리베이터 정원을 초과하여 태울 때)");
        } else if (responseCode == 401) {
            System.out.println("401:: X-Auth-Token Header가 잘못됨");
        } else if (responseCode == 500) {
            System.out.println("500:: 서버 에러, 문의 필요");
        } else { // 성공 후 응답 JSON 데이터받기
            BufferedReader br = new BufferedReader(new InputStreamReader(conn.getInputStream()));
            StringBuilder sb = new StringBuilder();
            String line = "";
            while ((line = br.readLine()) != null) {
                sb.append(line);
            }

            responseJson = new JSONObject(sb.toString());

        }
    } catch (MalformedURLException e) {
        e.printStackTrace();
    } catch (IOException e) {
        e.printStackTrace();
    } catch (JSONException e) {
        System.out.println("not JSON Format response");
        e.printStackTrace();
    }
    return parser.JSONtoData(responseJson);
}
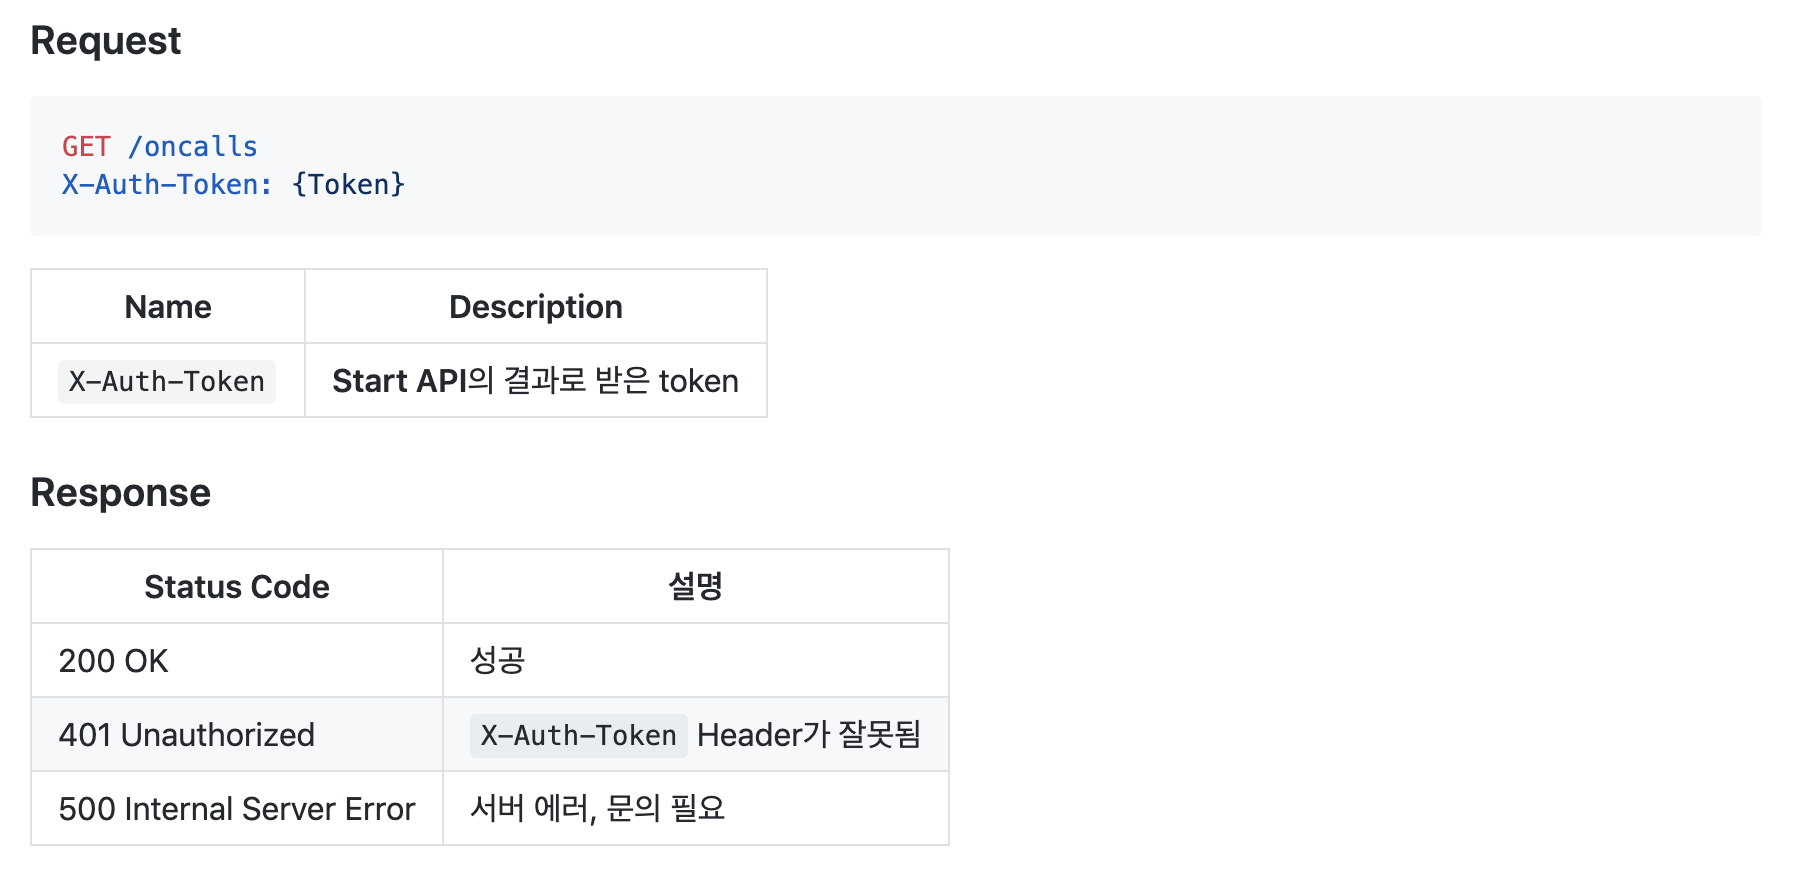
GET 형식 Request
POST에서 보내는 형식만 POST에서 GET으로 바꿔주면 된다.
//conn.setRequestMethod("POST");
conn.setRequestMethod("GET");
Data onCallsAPI() {
    HttpURLConnection conn = null;
    JSONObject responseJson = null;

    try {

        URL url = new URL(this.HOST_URL + "/oncalls");
        conn = (HttpURLConnection) url.openConnection();
        conn.setRequestMethod("GET");
        conn.setRequestProperty("X-Auth-Token", this.token);
        conn.setDoOutput(true);

        int responseCode = conn.getResponseCode();
        if (responseCode == 400) {
            System.out.println("400:: 해당 명령을 실행할 수 없음 (실행할 수 없는 상태일 때, 엘리베이터 수와 Command 수가 일치하지 않을 때, 엘리베이터 정원을 초과하여 태울 때)");
        } else if (responseCode == 401) {
            System.out.println("401:: X-Auth-Token Header가 잘못됨");
        } else if (responseCode == 500) {
            System.out.println("500:: 서버 에러, 문의 필요");
        } else { // 성공
            BufferedReader br = new BufferedReader(new InputStreamReader(conn.getInputStream()));
            StringBuilder sb = new StringBuilder();
            String line = "";
            while ((line = br.readLine()) != null) {
                sb.append(line);
            }

            responseJson = new JSONObject(sb.toString());
        }
    } catch (MalformedURLException e) {
        e.printStackTrace();
    } catch (IOException e) {
        e.printStackTrace();
    } catch (JSONException e) {
        System.out.println("not JSON Format response");
        e.printStackTrace();
    }
    Data data = parser.JSONtoData(responseJson);
    data.calls = parser.JSONtoCalls(responseJson);
    return data;
}
JSON Data Parsing하기
JSON Data를 다음과 같은 형식의 Data Object로 만들어보자.
public class Data {
    int timestamp = 0;
    ArrayList<Elevator> elevators = new ArrayList<Elevator>();
    ArrayList<Call> calls = new ArrayList<Call>();
    boolean is_end = false;

}

public class Elevator {
    int id = 0;
    int floor = 1;
    ArrayList<Call> passengers = new ArrayList<Call>();
    String status = "";
}

public class Call {
    int id = 0;
    int timestamp = 0;
    int start = 0;
    int end = 0;
}
JSON Object to JAVA Object
{
    "token": "TVqpM5MX0amQqhrYKd3ZwMZn3Im6y4ovJwEa_A1-2d6mBpl4QhwJmmkrrvG4MsaD+mG44dL0aC0RNYL",
    "timestamp": 8,
    "elevators": [
        {
            "id": 0,
            "floor": 6,
            "passengers": [
                {
                    "id": 0,
                    "timestamp": 0,
                    "start": 6,
                    "end": 1
                }
            ],
            "status": "OPENED"
        },
        {
            "id": 1,
            "floor": 1,
            "passengers": [],
            "status": "STOPPED"
        }
    ],
    "is_end": false
}
- 위와 같은 형식으로 들어온 JSON Object를 파씽하는 코드이다.
public ArrayList<Elevator> getElevatorsFromOnCalls(JSONObject responseJson) {
    ArrayList<Elevator> elevatorList = new ArrayList<>();

    try {
        JSONArray elevators = responseJson.getJSONArray("elevators");
        for (int i = 0; i < elevators.length(); i++) {
            JSONObject data = elevators.getJSONObject(i);

            JSONArray passengerdatas = data.getJSONArray("passengers");
            ArrayList<Call> passengers = new ArrayList<>();
            for (int j = 0; j < passengerdatas.length(); j++) {
                JSONObject passengerData = passengerdatas.getJSONObject(j);
                Call call = new Call();
                call.setId(passengerData.getInt("id"));
                call.setTimestamp(passengerData.getInt("timestamp"));
                call.setStart(passengerData.getInt("start"));
                call.setEnd(passengerData.getInt("end"));
                passengers.add(call);
            }

            Elevator elevator = new Elevator();
            elevator.setId(data.getInt("id"));
            elevator.setFloor(data.getInt("floor"));
            elevator.setStatus(data.getString("status"));
            elevator.setPassengers(passengers);
            elevatorList.add(elevator);
        }


    } catch (JSONException e) {
        e.printStackTrace();
    }
    return elevatorList;
}
- 먼저 엘리베이터라는 JSONArray를 받고 그 안에 있는 JSONObject를 하나씩 꺼내보자.
- 각 속성 값은 getInt, getString, getBoolean 과 같은 함수에 key 값을 넣어주어 가져오면 된다.
- JSONArray에서 i번째 object를 꺼내려면 getJSONObject(i) 라는 함수를 이용하면 된다.
JAVA Object to JSON Object
- 이번에는 command라는 Object를 다음과 같은 json형식 데이터로 바꿔보자.
public class Command {
    int elevator_id = 0;
    String command = "";
    ArrayList<Integer> call_ids = new ArrayList<Integer>();
}

{
    "commands": [
        {
            "elevator_id": 0,
            "command": "ENTER",
            "call_ids": [0]
        },
        {
            "elevator_id": 1,
            "command": "STOP"
        }
    ]
}
command JSON Object 만들기
public class Command {
    int elevator_id = 0;
    String command = "";
    ArrayList<Integer> call_ids = new ArrayList<Integer>();
    JSONObject cmdJSON = new JSONObject();
    Command(){
        try {
            cmdJSON.put("elevator_id", elevator_id);
            cmdJSON.put("command", command);
            if (call_ids != null)
                cmdJSON.put("call_ids", call_ids);
        } catch (JSONException e) {
            e.printStackTrace();
        }
    }
}
- JSON Object를 만들고 put 함수를 이용해서 속성값을 하나씩 넣어준다.
JSON Object로 JSON Array 만들기
public JSONArray commandstoJSON(ArrayList<Command> commands) {
    JSONArray commandsJSON = new JSONArray();
    for(Command command : commands) {
        commandsJSON.put(command.cmdJSON);
    }
    return commandsJSON;
}
- 미리 만들어둔 JSON Object를 하나씩 꺼내서 새로 만든 JSONArray에 put 함수를 이용해서 일일이 넣어준다.
내일의 다짐
- 배우러 갔다 오자!
이 포스팅은 쿠팡 파트너스 활동의 일환으로, 이에 따른 일정액의 수수료를 제공받습니다.
Subscribe via RSS