바닐라 자바스크립트로 Widget 기반 To Do List Web Page 클론코딩하기
by 줌코딩
나는 Express를 활용해서 백엔드 개발을 해본 경험은 있기에 자바스크립트가 조금은 익숙하지만 React, Vue, Angular와 같은 프론트엔드 프레임워크는 익숙치 않다. 하지만 Flutter을 활용해서 앱의 UI를 개발해 본 경험이 있기에 Flutter에서 사용하는 Widget 기반 UI 개발 방식에 익숙하다.
그렇다면 내가 아는 방법을 활용해서 웹을 만들 수 있을까?
목표
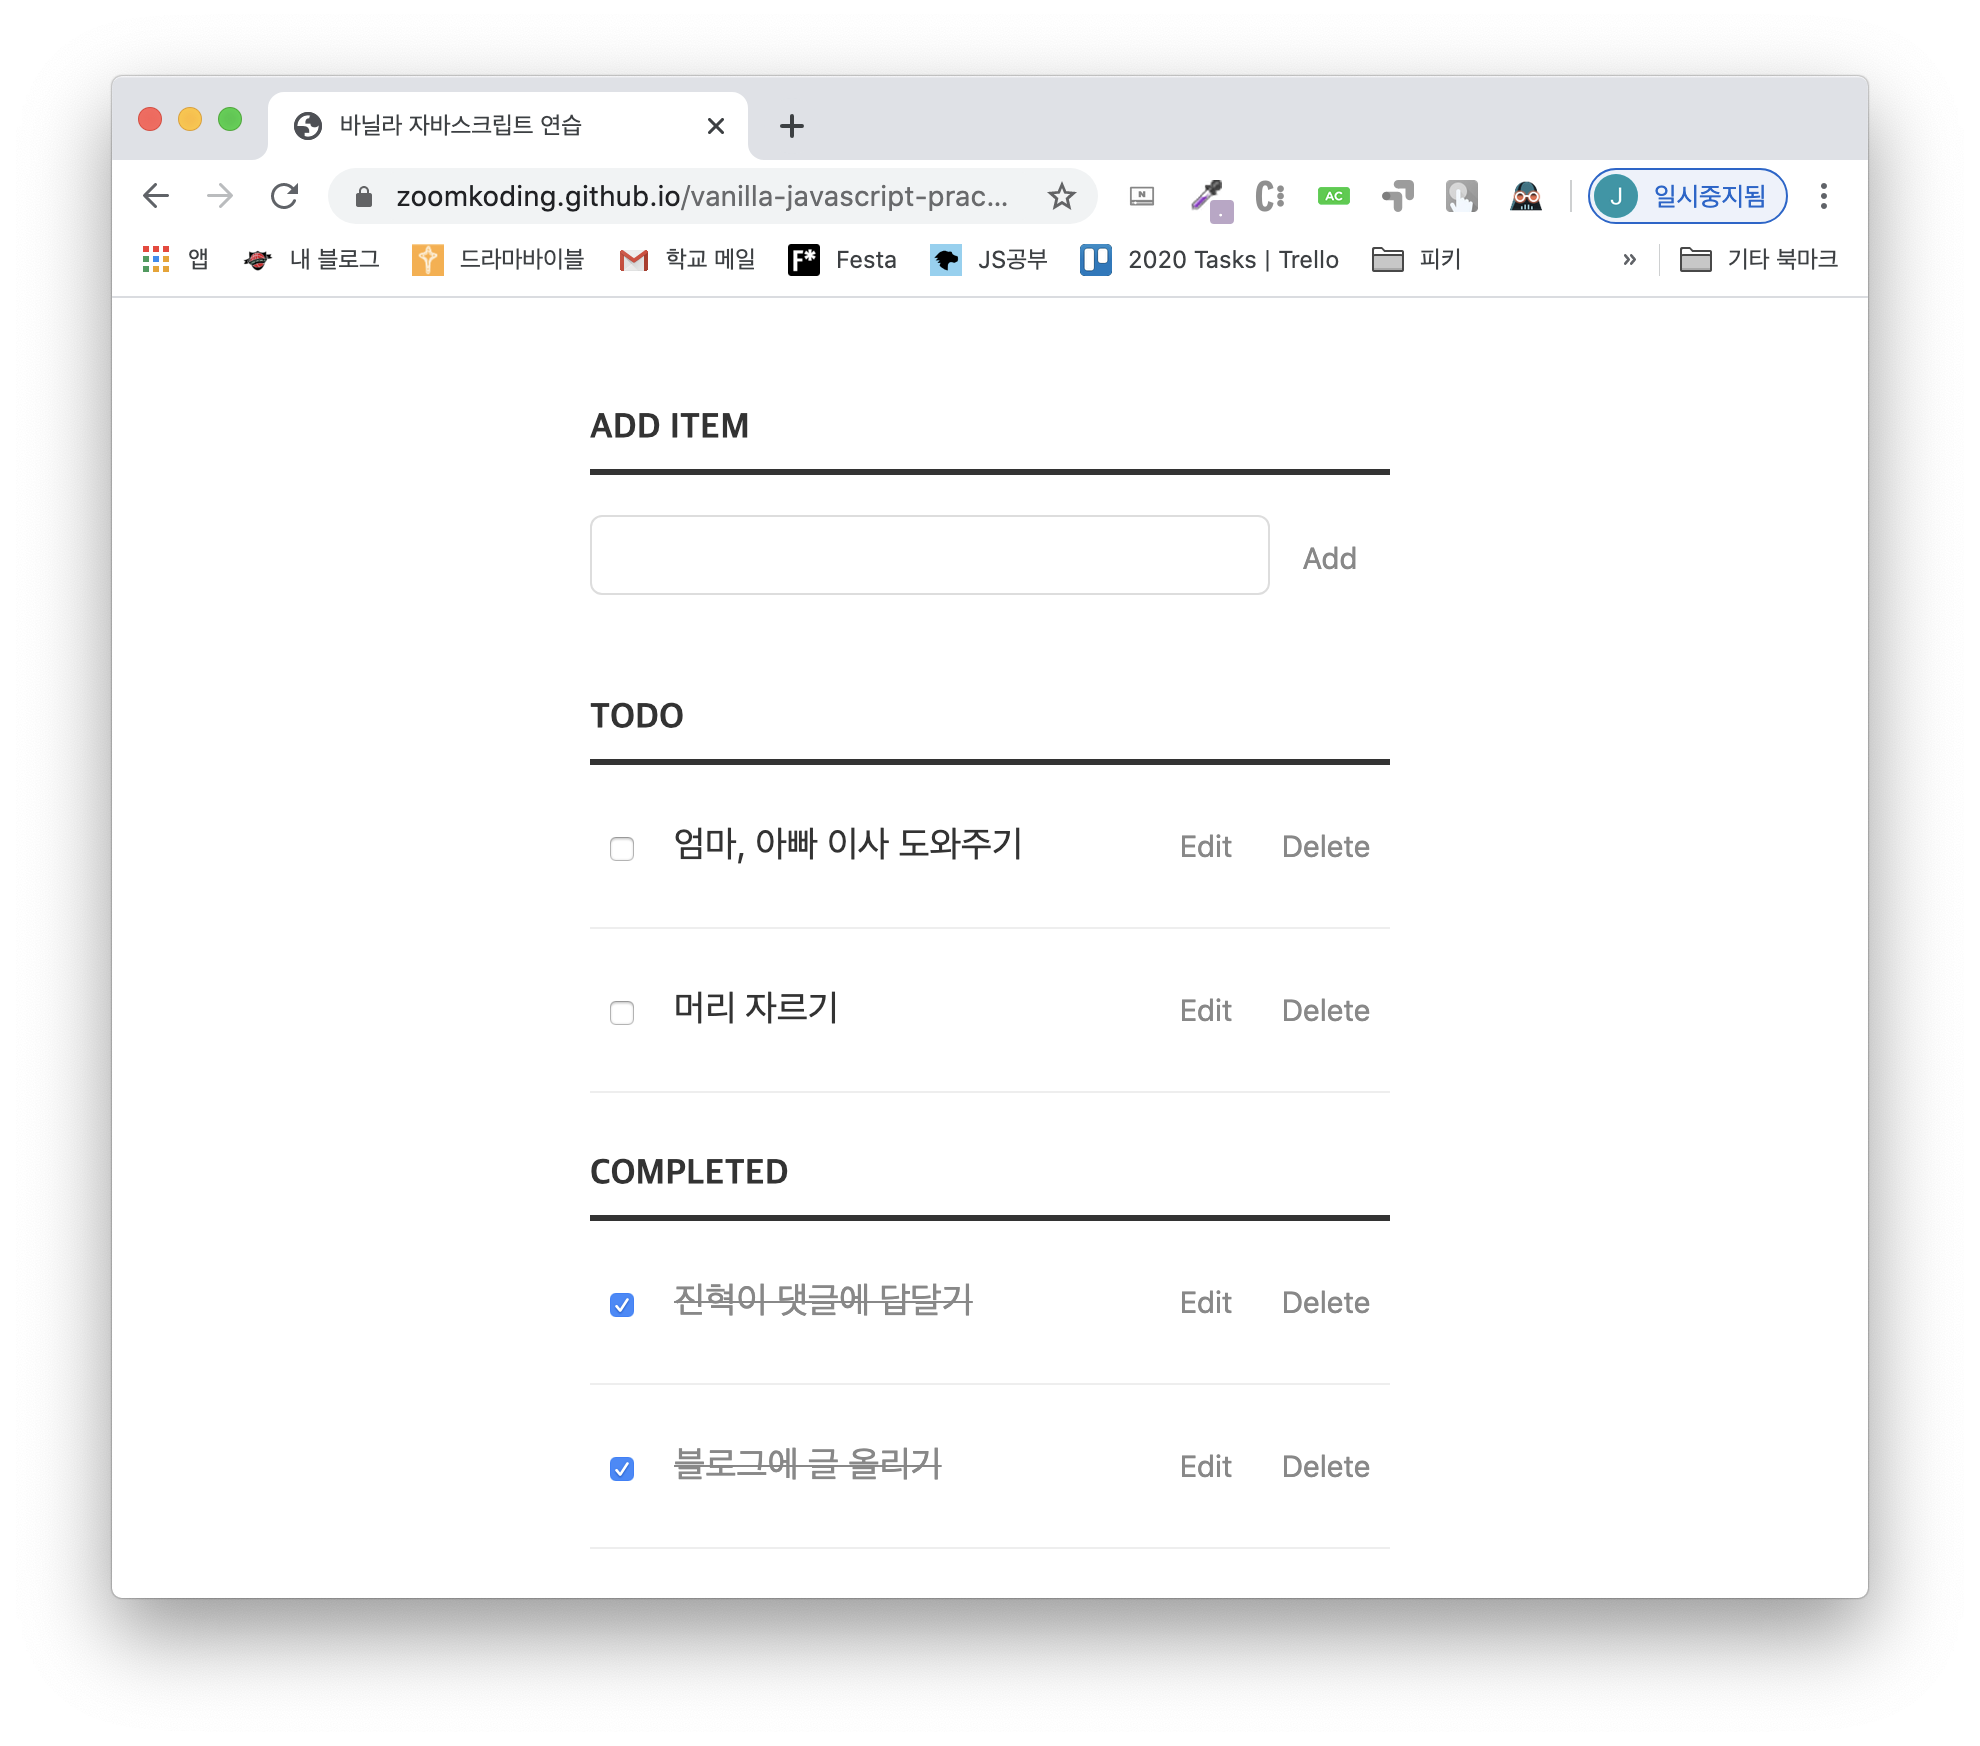
To Do List Page 클론하기!
내 소스 코드는 solution/zoomkoding branch에 있다.
수행 방법
- Plain Javascript를 활용해서 Web Page를 구축해보자.
- Widget을 쌓아 UI를 만드는 Flutter처럼 각 Widget을 만드는 함수를 만들어보자.
- 반복되는 Widget을 재사용하면서
Atomic Design Pattern을 흉내내보자.
제한 시간
- 4시간(집중해서 하기 위해서 시간 제한을 뒀다.)
- html, css는 수정 불가능!
- library 사용 금지!
- Codepen 코드 참고하지 않기!(완성하고 참고하기)
결과물

느낀점
Flutter에서 Widget 만들듯이 Widget 내에서 styling까지 다 진행했다. 이게 좋은 방법이 아니지만 그래도 자바스크립트만으로 유사한 결과물을 만들고 나름 재사용성 높은 코드를 짠 것 같아 기뻤다. 조만간 React나 다른 자바스크립트 프레임워크도 공부해봐야겠다.
코드
Atomic Design Pattern을 흉내내기 위해 최소 단위의 Component를 Atoms로 Atoms를 활용해서 만든 Component를 Molecules 그리고 Molecules를 활용해서 만드는 Component를 Organisms로 정의했다. 이번 프로젝트를 위해서 정의한 Component는 다음과 같다.
Atoms
- H3
- Button
- CheckBox
- TextField
Atoms/TextField.js
export default function TextField(value = '', width = '318px') {
    const textField = document.createElement('input');
    textField.type = 'text';
    textField.value = value;
    textField.style.width = width;
    textField.style.height = '18px';
    textField.style.padding = '10px';
    textField.style.border = '1px solid #ddd';
    textField.style.borderRadius = '6px';
    textField.style.fontSize = '18px';
    textField.style.color = '#888';
    textField.onfocus = () => textField.style.color = '#333';
    textField.onblur = () => textField.style.color = '#888';

    textField.disable = () => {
        textField.disabled = true;
        textField.style.border = 'none';
        textField.style.color = '#333';

    }
    textField.enable = () => {
        textField.disabled = false;
        textField.style.border = '1px solid #ddd';
        textField.style.color = '#888';
    }
    return textField;
}
Molecules
- Title
- Task
- Section
Molecules/Task.js
import Checkbox from '../Atoms/CheckBox.js';
import Button from '../Atoms/Button.js';
import TextField from '../Atoms/TextField.js';

export default function Task(isAdded = false, name = '') {
    const task = document.createElement('div');
    const textField = isAdded ? TextField(name, '226px') : TextField();
    let isTextFieldEnabled = true;

    task.style.height = '41px';
    task.style.width = '400px';
    task.style.padding = '20px 0';

    function onCheckboxClick(isChecked) {
        if(isChecked) {
            textField.style.textDecorationLine = 'line-through';
            textField.style.color = '#888';
            document.getElementById('complete').appendChild(task);
        }
        else{
            textField.style.textDecorationLine = 'none';
            textField.style.color = '#333';
            document.getElementById('todo').appendChild(task);
        }
    }
    function onDeleteButtonClick() {
        task.remove();
    }

    function onEditButtonClick() {
        if(isTextFieldEnabled) textField.enable();
        else textField.disable();
        isTextFieldEnabled = !isTextFieldEnabled;
    }

    function onAddButtonClick() {
        document.getElementById('todo').appendChild(Task(true, textField.value));
        textField.value = '';
    }

    //A Task added to TODO or COMPLETED list
    if(isAdded){
        textField.disable();
        const checkbox = Checkbox(onCheckboxClick);
        const editButton = Button('Edit', onEditButtonClick);
        const deleteButton = Button('Delete', onDeleteButtonClick, '#CF2323');
        task.appendChild(checkbox);
        task.appendChild(textField);
        task.appendChild(editButton);
        task.appendChild(deleteButton);
        task.style.borderBottom = '1px solid #eee';
    }
    //A Task under ADD ITEM section
    else {
        const addButton = Button('Add', onAddButtonClick);
        task.appendChild(textField);
        task.appendChild(addButton);

    }
    return task;
}
Organisms
- AddItemSection
- ToDoListSection
- CompleteListSection
Organisms/AddItemSection.js
import Task from '../Molecules/Task.js';
import Section from '../Molecules/Section.js';


export default function AddItemSection() {
    const section = Section('addItem', 'ADD ITEM');
    const task = Task();
    section.appendChild(task);
    return section;
};
이 포스팅은 쿠팡 파트너스 활동의 일환으로, 이에 따른 일정액의 수수료를 제공받습니다.
Subscribe via RSS
